
The fastest way to waste a good transparent sheet is a careless install. A noise protection wall acrylic panel that is correctly made but badly fixed will rattle, whistle, collect grit and eventually crack at the bolt line — all while the acoustic engineer’s design numbers look fine on paper.
Stages that decide whether the wall works
Installation is not one job but a sequence of decisions. The foundation has to be level and the posts plumb before the panels arrive, otherwise the sheet is forced into a frame that is not square. Then comes the panel itself, fixed with the right bearing pads and bolts torqued to spec, and finally the seal between panel and frame so wind does not whistle through. Cut the sequence short and the acoustic and structural performance both suffer.
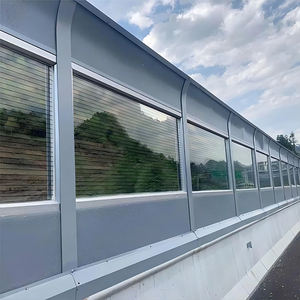
The four stages that matter
- Foundation and post layout, plumb and level before panels arrive.
- Panel bearing and bolt torque, sized for wind and impact.
- Frame-to-panel sealing to stop noise and water bypass.
- Expansion accommodation so the sheet does not bind in the frame.
Before you commit to the install, review the acrylic noise barrier installation sequence and check what a test report should prove, at transparent noise barrier panel test report guidance.
Frequently Asked Questions
Q: What fails most often on an acrylic noise wall?
A:The install, not the sheet. Out-of-square posts, wrong bolt torque and unsealed edges cause rattling, cracking and noise bypass that no panel grade can fix.
Q: Can an acrylic noise protection wall be installed later?
A:Yes, transparent panels work well as a retrofit, but only if the new posts and seals are set up properly to transfer wind load without point-loading the sheet.
For an acrylic noise barrier or wind screen quote matched to your route and loading, email oversales@rpplexiglass.com with the corridor, height, panel size and wind zone.